Sphinx Documentation
sudo apt-get install texmaker gummi texlive texlive-full texlive-latex-recommended latexdraw intltool-debian lacheck libgtksourceview2.0-0 libgtksourceview2.0-common lmodern luatex po-debconf tex-common texlive-binaries texlive-extra-utils texlive-latex-base texlive-latex-base-doc texlive-luatex texlive-xetex texlive-lang-cyrillic texlive-fonts-extra texlive-science texlive-latex-extra texlive-pstricks
Todo
Link checking is facilitated by sphinx using
make linkcheck(on windows)Add section on FontAwesome inline icons from
sphinx-panelsAdd tutorial/ section on maintaining a bibliography in Sphinx.
Compile documentation with Sphinx
This example is a step-by-step guide on how to compile the tudat documentation
locally on your system using sphinx. This procedure works to compile documentation for both the tudat-space and the documentation you are currently reading.
Note
This procedure requires that Anaconda or Miniconda is installed. For information regarding the use of the conda ecosystem, please see Getting Started with Conda.
Create an environment that will be satisfy all dependencies required for building documentation, then activate it. This can be done by downloading this `environment.yaml
- <https://github.com/tudat-team/tudat-space/blob/develop/docs/environment.yaml>`_ file, which
will install the
tudat-docsconda environment.
conda env create -f environment.yaml & conda activate tudat-docs
Enter the root directory of a repository containing a
docsdirectory, which contains asourcesubdirectory. The following command is specific to cloning and entering thetudat-spacerepository.
git clone https://github.com/tudat-team/tudat-space.git & cd tudat-space
Build the documentation using the
sphinx-buildcommand, specifying that html is to be built with the supplied source and output build directory.
sphinx-build -b html docs/source docs/build
View the local build of the documentation by opening the
docs/build/index.htmlwith your preferred browser.
Tip
[PyCharm/CLion] You can do this in by right clicking index.html in the Project tree and selecting Open with Browser.
Compiling Documentation in PyCharm
If you are using PyCharm, the compilation of the documentation after each edit can be simplified by setting up a run configuration tailored for sphinx. The procedure is described below.
From the main toolbar, click on
Run > Edit Configurations;In the window that has just opened, click on the
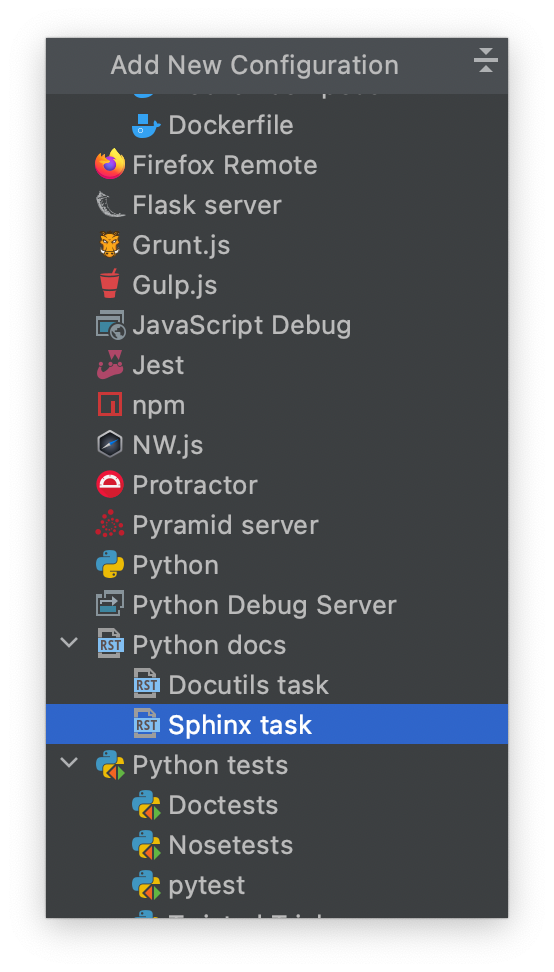
+button (upper-left) to add a new configuration;From the drop-down menu, select
Python docs > Sphinx task;
Give a name to the new run configuration;
Make sure that the field
Commandis set onhtml;For the
inputandoutputfields, select thesourceandbuildfolders respectively.
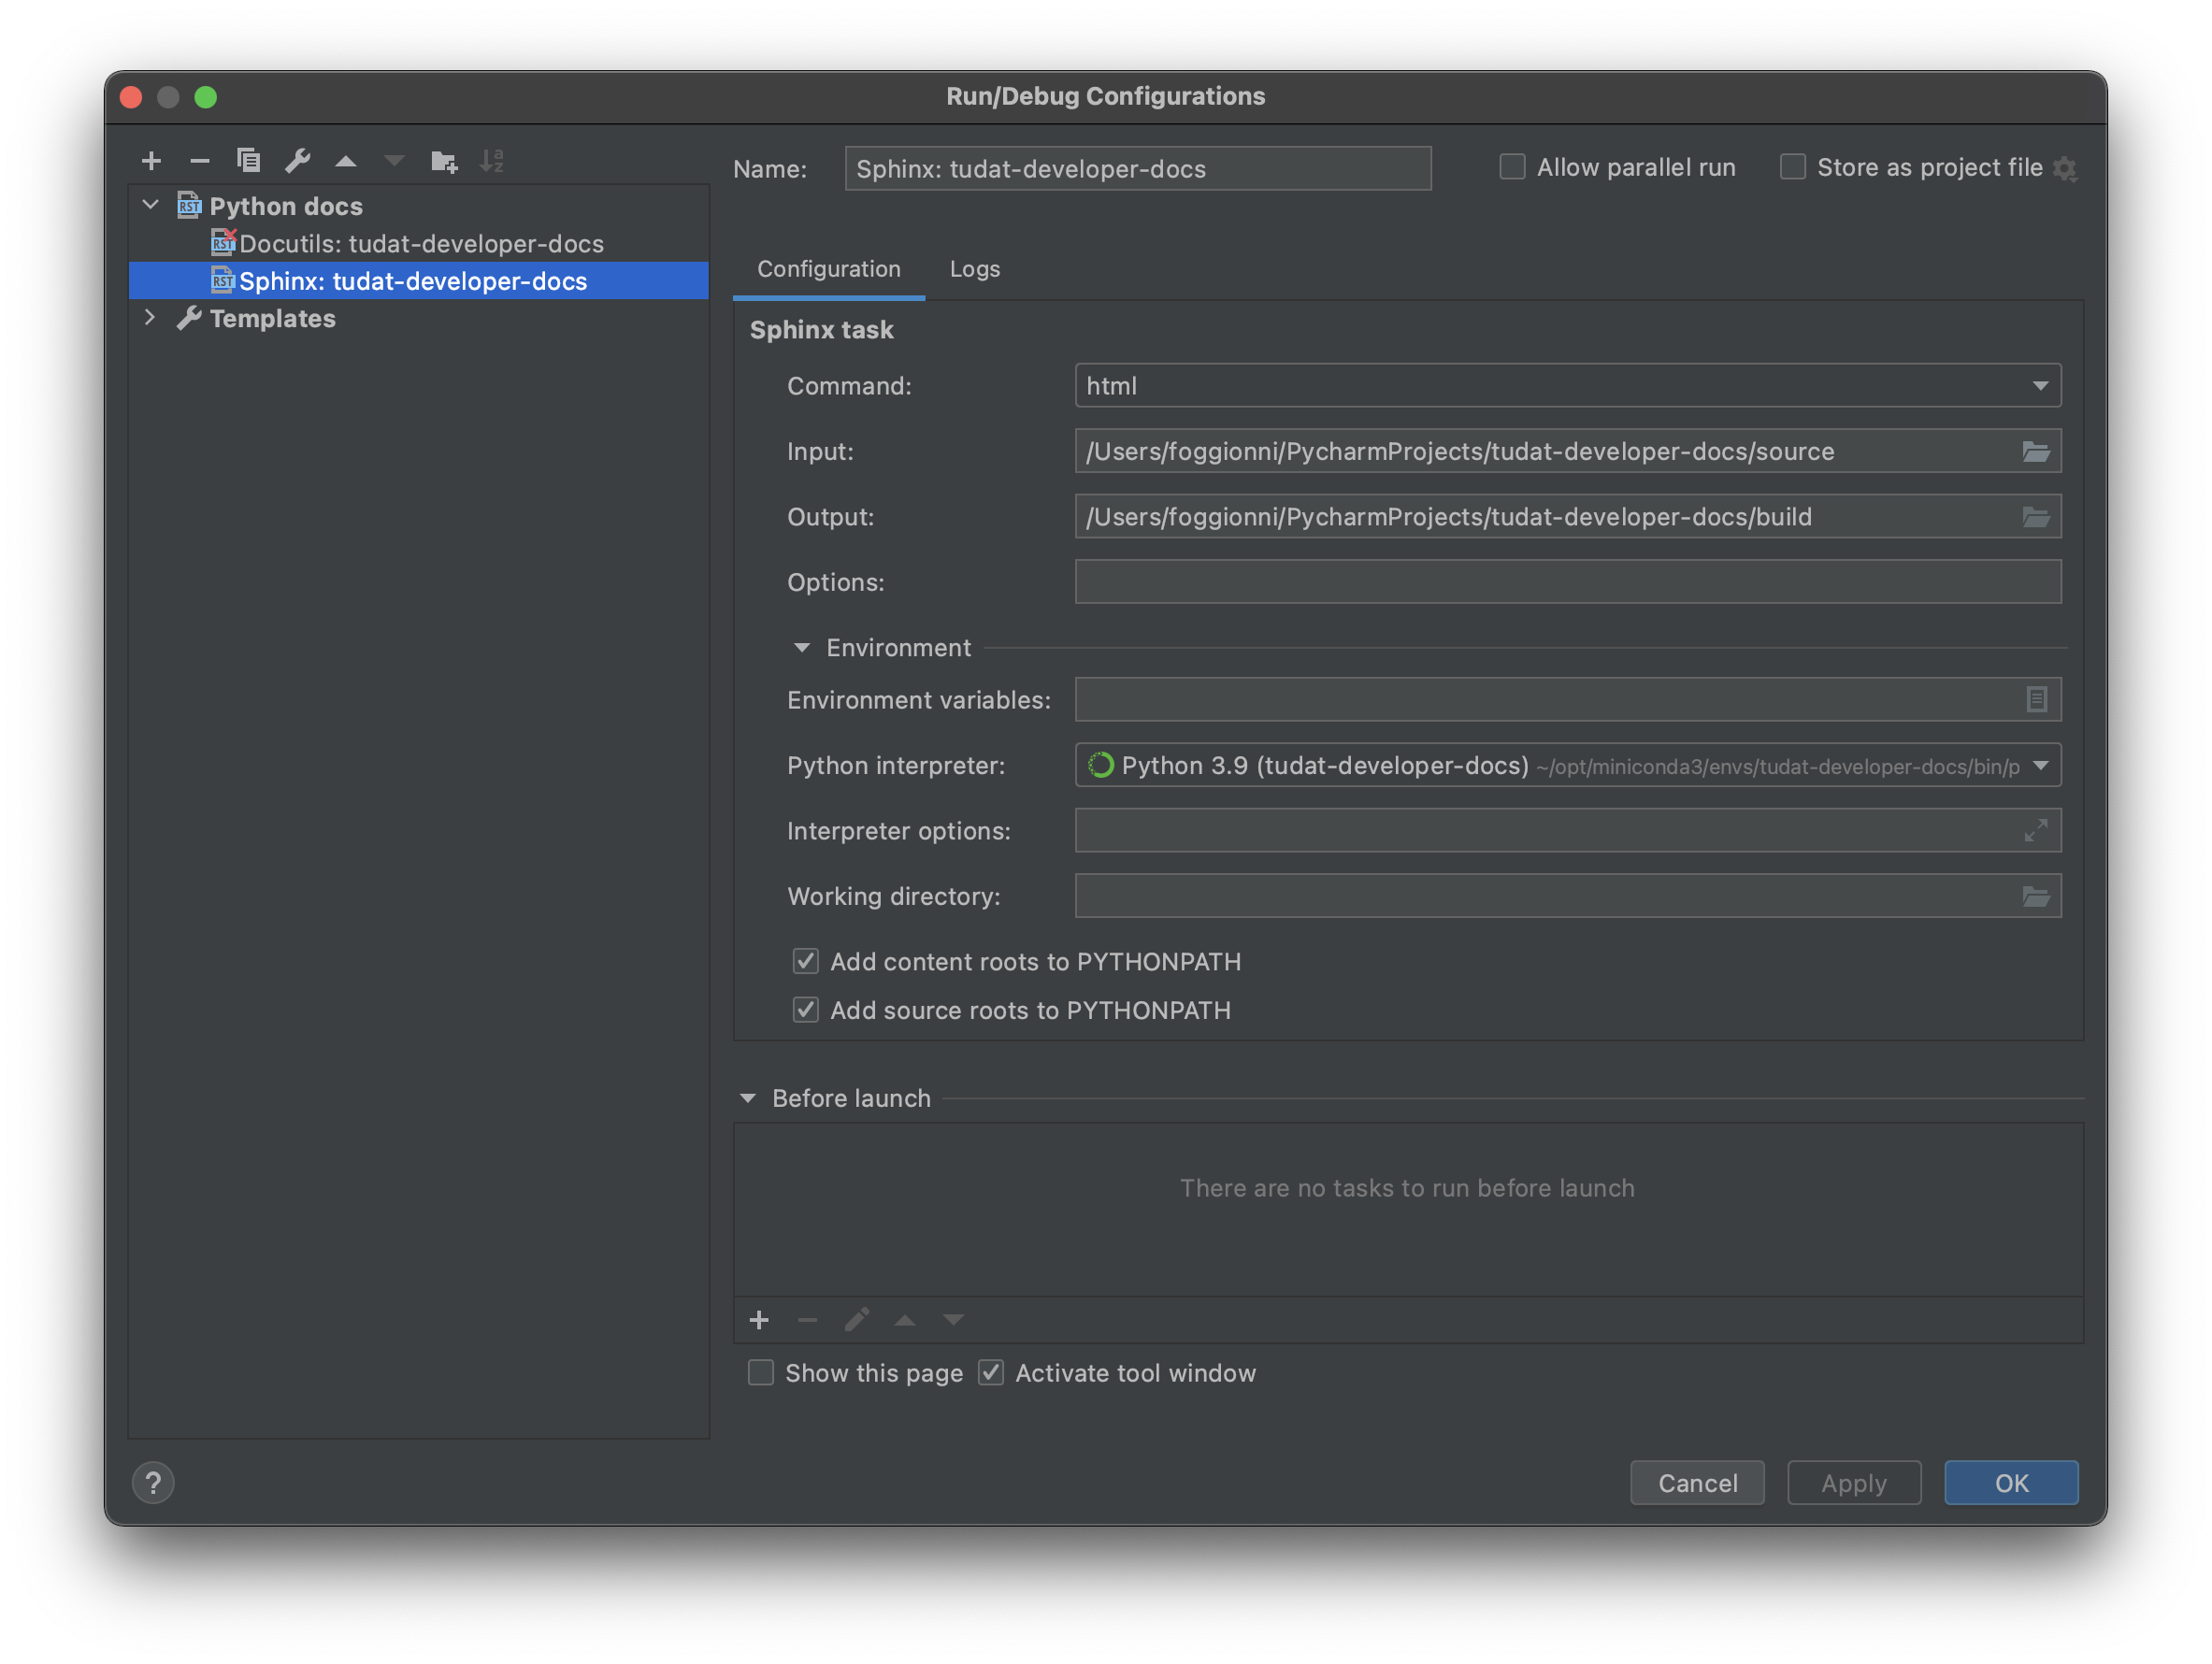
Make sure that the correct run configuration is selected. If so, pressing Run will be equivalent to executing the following command from the command line:
sphinx-build -b html docs/source docs/build
Troubleshooting
In this section, we collect the most recurring bugs that can happen while using sphinx, hoping that it will save precious time to future Tudat contributors.
No changes shown in browser
It happens often that the browser shows cached data instead of the updated html files. As a result, if you don’t see your changes, try to empty/delete the cache of your browser (see, e.g., this guide).
No changes shown in online docs
It can happen that, after pushing your changes to the origin repository, no changes are shown on the actual
website (e.g., on tudat-space or on this website). Some suggestions to identify the problem will follow:
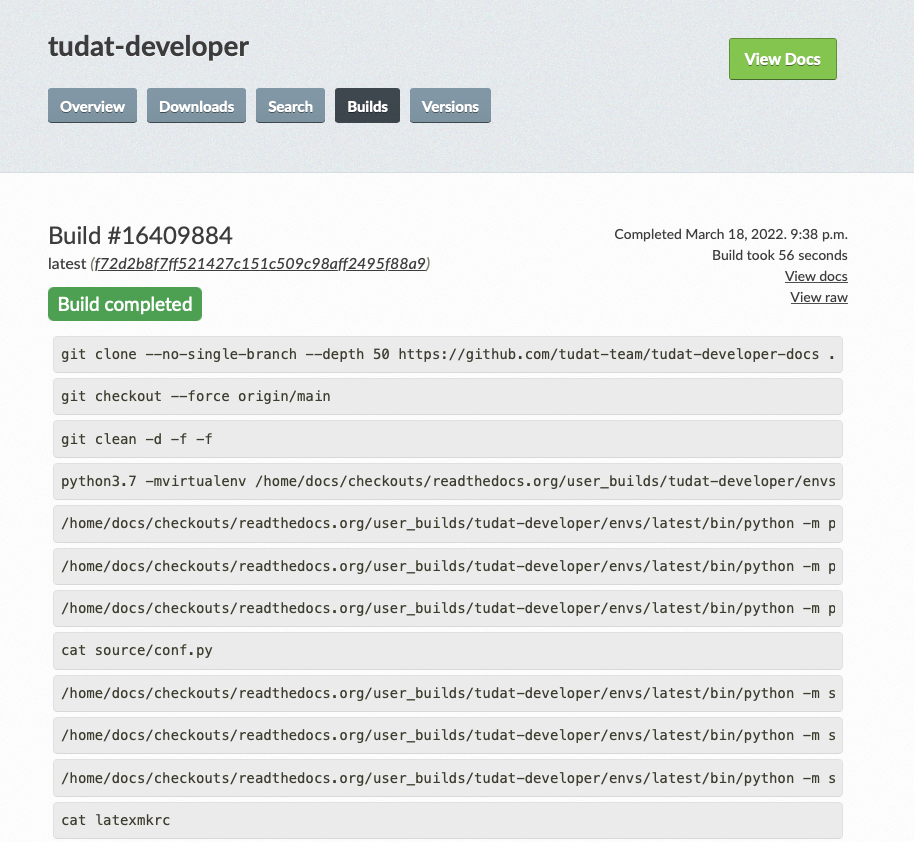
Check that you pushed to the
mainbranch. The documentation is built by readthedocs only if changes are pushed to that branch.Check that the build was successful. This can be monitored via the “Builds” link in the readthedocs_menu_ (see screenshot above). If the build was not successful, you can click on it and see the output of the build. This can be helpful to identify where things are going wrong.
Sphinx commands not working
If a sphinx command does not work, for instance the following:
.. toctree::
   intro
   guide
it can be due to many things, but before going crazy into debugging mode, check that the amount of spaces before
intro and guide correspond to three empty spaces. Sphinx requires three empty spaces, but
the tab key corresponds to four empty spaces: if you use it in sphinx commands, it can generate a lot of confusion
because the extra white space will break the sphinx command and it is very difficult to notice as well.
To be clear, this will likely not work:
.. toctree::
    intro
    guide
Nbsphinx gallery
This section shows the various aspects that are relevant when creating thumbnail galleries in Sphinx documentation, in particular the example applications on tudat-space.
For the example-applications on tudat-space, a thumbnail gallery is used to visualise the various examples. A crucial part of this documentation is the fact that the examples themselves are jupyter notebooks. Sphinx has a seamless way of integrating both .rst and .ipynb files into the documentation source.
Prerequisites for using thumbnail galleries is that the nbsphinx and spyinx_gallery.load_style extensions are added to the list of extensions in the conf.py file of the documentation.
Creation of thumbnail galleries
There are a number of ways to give thumbnails to files. The main way of assigning a thumbnail is by accessing the metadata of the jupyterlab cells and editing the tags attribute as follows:
{
   "cell_type": "code",
   "execution_count": <execution_count>,
   "id": "<cell_id>",
   "metadata": {
    "tags": [
     "nbsphinx-thumbnail" <-- here the thumbnail tag can be added
    ]
   },
   "outputs": [
    {
     "data": {
      "image/png": <image_binary>,
      "text/plain": [
       "<Figure size 1500x800 with 1 Axes>"
      ]
     },
     "metadata": {},
     "output_type": "display_data"
    }
   ],
   "source": [
   <plotting_code>
   ]
  }
Further customisation is possible – adding tooltips when hovering over the thumbnail, for example. See here for more options.
Another way that thumbnails can be determined is by adding an image to the source code that is hardcoded to be linked. This is added to the conf.py file, which is somewhat inconsistent with the other thumbnails, so this should be avoided if possible. However, the main advantage is that this thumbnail can be set for .rst files, preventing the unnecessary use of jupyter notebooks. Below is an example of a thumbnail added to the conf.py file:
nbsphinx_thumbnails = {
  './relative/path/to/thumbnail-file': './relative/path/to/image.png',
  ...
}
This structure allows you to build in a number of levels of thumbnail galleries that introduce concepts gradually and take the reader by the hand, rather than showing them a long list of all the possible applications of Tudat.
Warning
An issue that arises frequently is that the built documentation does not resemble the changes you think you made. In this case it is best to fully rebuild the documentation page by adding the -E optional argument to the sphinx-build build command.
Useful tips
If there is no thumbnail available, a placeholder thumbnail is shown.
If there are multiple outputs in the selected cell, the last one is used.
You can specify the “output-index” parameter to choose what output you would like if the cell outputs multiple figures.
Make sure only one cell has the nbsphinx-thumbnail metadata.
This paragraph includes a general recommendation on the structure of nbsphinx galleries with .ipynb example code. Currently, there is one .rst file that has a large list of all example .ipynb files. The thumbnails are organised by topic, but are static in the .rst file. A better way is to structure each topic (PyGMO, Propagation or other) with a unique .rst file, so as to replicate the structure of the documentation in the source code. This allows a more structured layout of the nbsphinx galleries. Moreover, examples spanning multiple sub-topics can be given an extra directory which can easily be described using .rst files, rather than having all examples in a single .rst file.